Working Out Little Details: a Bath Shelf
A potential DIY Ally client asked me if I enjoy working out little details. She wrote: “Hello, I am remodeling a 1938 bath in Washington DC. Have worked with architects previously, so attempting this without an architect, with a very trustworthy contractor. But he’s not a designer, and I want to do something unconventional (from a standard builder point of view) with a long narrow shelf across the width of the room.”
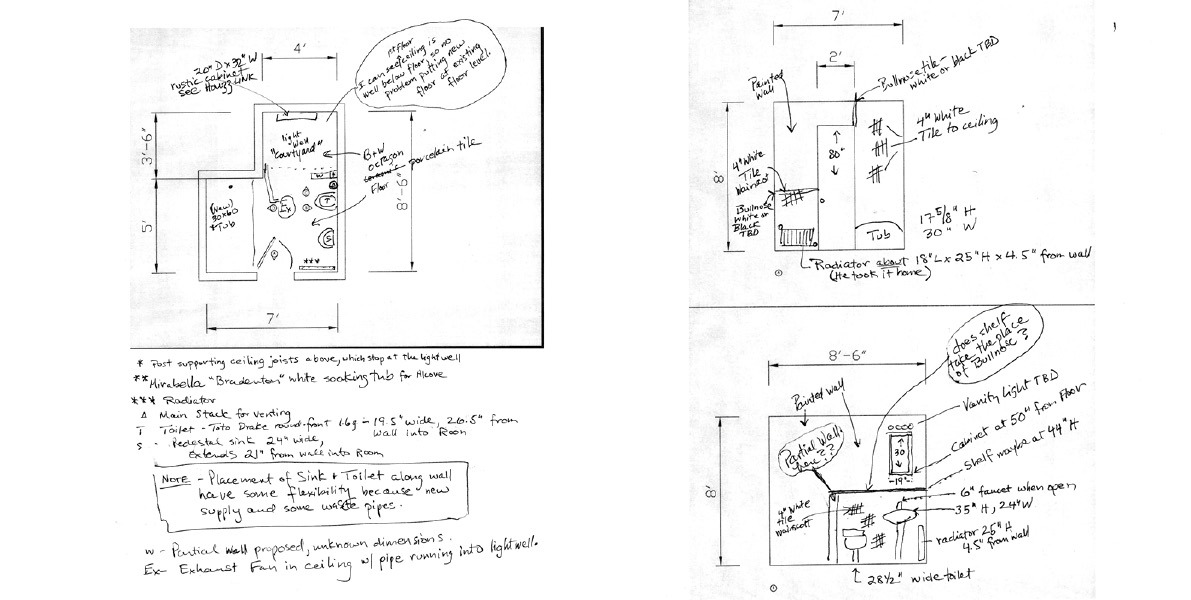
She got the idea from photos on Houzz. Her questions had to do with “dimensions, material, and how the shelf would tie into the walls.” She wrote: “I need to know how it would relate to the tile wainscoting and very specific inches of different materials joining together. And also the overall proportion of this design element in the room.”
Of course I enjoy working out little details like this!
I was happy to help with this project. To get started, I needed:
- sketches/floor plan and elevations with dimensions,
- original inspiration,
- all of the materials being considered.
My client sent photos of the bath to be remodeled. She explained that there is an old light/air well they are replacing with a Velux skylight to create her own “courtyard.”

Floor Plan and Elevations
It took me a while to digest all of the little details. Actually, addressing the bath shelf seemed most straightforward and a good place to start. I suggested using 3/8” thick glass with square polished edges.
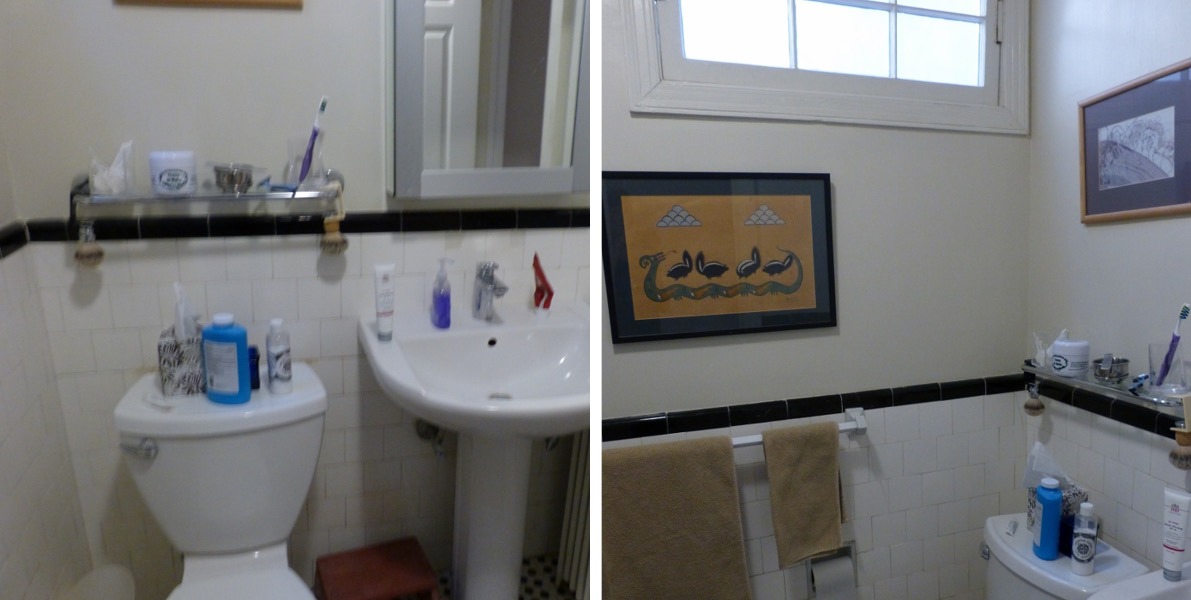
My client replied: “Interesting…. I like that it’s glass for the same reason as pedestal sink, white tile, and wall paint – to lighten and open up the small space. So that part is nice. But I already had one in there – I think it’s in the pictures – one of those little glass shelves over the toilet.

Existing shelf
It seems more decorative than useful, something to just put a box of tissue and a budvase on. Would this be a nice solid surface, one that went across the 5′ space and didn’t feel fragile?”
A bath shelf as a clean unbroken surface
That’s the idea: to run a continuous shelf along the entire wall. I searched for the type of hardware that would support the weight of the cantilevering glass and would meet my aesthetic vision. I wanted it to practically “disappear.”

Extruded bracket
I found a good option. Offered in 96” (2.4 m), a cut-to-length extrusion is strong enough even for a 12” deep bath shelf. It could be the same color as the wall or mimic the existing silver medicine cabinet trim.
The client and her contractor responded favorably to my suggestion. In such a small bath, the glass shelf is much more compatible with the porcelain/ceramic surfaces than wood, the client’s original inspiration.
Of course, they could paint the wood glossy white. But even then, it would have a heavier presence because of its thickness.
The glass would be 6” wide by 5’ long by 3/8” thick. It would be supported by a continuous aluminum extrusion (for the entire length of it). That way, the support will be invisible/will not draw any attention to itself.
Using this hardware will eliminate the need of connecting it to end walls, as would be the case with a heavier stone one. It would float on top or above the tile.
There you have it! Working out small details here at allaDIYally.com is business as usual. This particular bath shelf is not an exception. Please contact me here if you have questions about your own remodeling project. Everyone is welcome!
SHARE
Post a Comment
You must be logged in to post a comment.


Mia Kazovsky
You are, after all, a Detail Queen. This long glass shelf sounds so elegant and like a super elevated design detail. Such great advice, as usual.
Alla DIY Ally
Thank you, Mimchik!!! I appreciate it!
Bob
With a little planning this would be an easy Saturday afternoon DIY project! It so simple and practical, yet so elegant!
Alla DIY Ally
Thank you, Bob!! That’s what I thought.
education online courses
That is very interesting. You are a very skilled blogger. I’ve joined your rss feed and look forward to seeking extra of your wonderful post. Also, I’ve shared your website in my social networks
http://edutips.eu