How to Streamline Your Kitchen Elevations
My DIY Ally client emailed: “They have hooked us up with a contractor to do our kitchen remodel, which includes ‘design’ services. We have been underwhelmed by their cabinet layout designs, so we were wondering what you might charge to look at their proposal. Can you show us how to streamline our kitchen elevations?”
He attached the contractor’s elevations and ended with the following: “We just trust your eye and are hoping for clarity before we dig into the real work.” Of course, I told him that I’d be glad to be of service.
The changes had to focus on organizing a random pattern of elements through regularity and continuity
My client felt the proposed elevations were “a mess,” as they looked “very uneven.” In addition, he was concerned with dead spaces in the corners and was “open to any suggestions.”
Before digging in, I had a few questions. Since they were changing the windows, I wondered if they would be open (pun intended) to increase their size a bit. Also, would they be willing to give up wall cabinets on the sink (window) wall? If so, we could center the fridge on the windows.
Once the information was gathered, I knew exactly what to do.
They asked me how to streamline their kitchen elevations. Here are my suggestions:
#1: Embrace symmetry to create balance.
#2: Order elements using an axis; arrange equivalent forms on either side of an imaginary line.
#3: Treat each wall not only as its own composition, but also as an integral part of a whole.
#4: Align; carry datum lines over to adjacent elevations. The idea is to gather the elements and organize volumetrically.
# 5: Use repetition and regularity of spacing for visual continuity.

Revised Plan
I reworked the plan to maintain a consistent module. It laid out really well with 24” module, as the dishwasher, microwave drawer, and wine fridge they’ve selected are 24” wide.
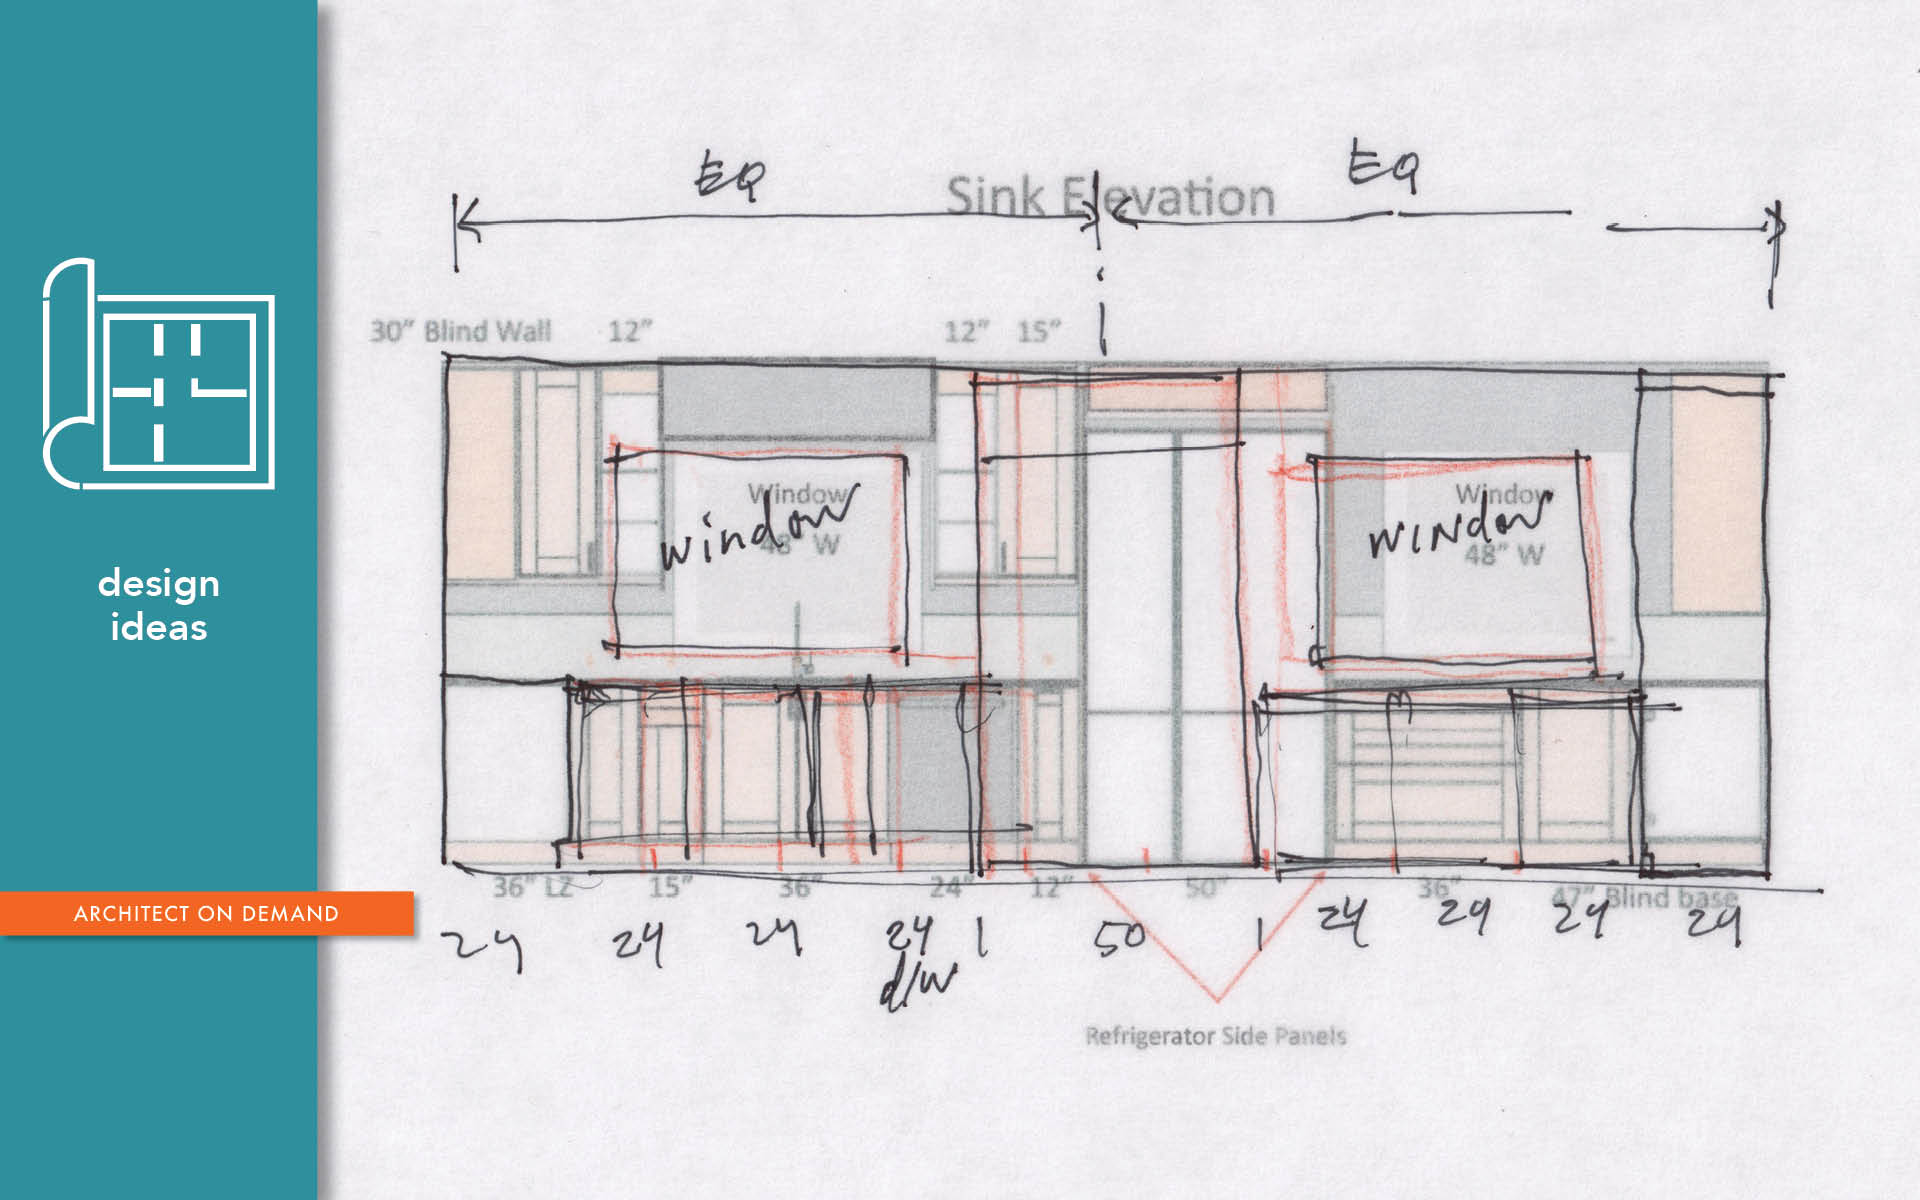
The first version had to be tweaked. As requested, I put dimensions on elevations, added cabinets above the hood, and worked out the windows so that the left one is centered on the sink. I wrote: “Please note that the cabinets on either side of the range are aligned with the hood. It’s a personal preference.”
Here’s what I proposed to them. For the sake of expediency, I simplified the cabinet door design:
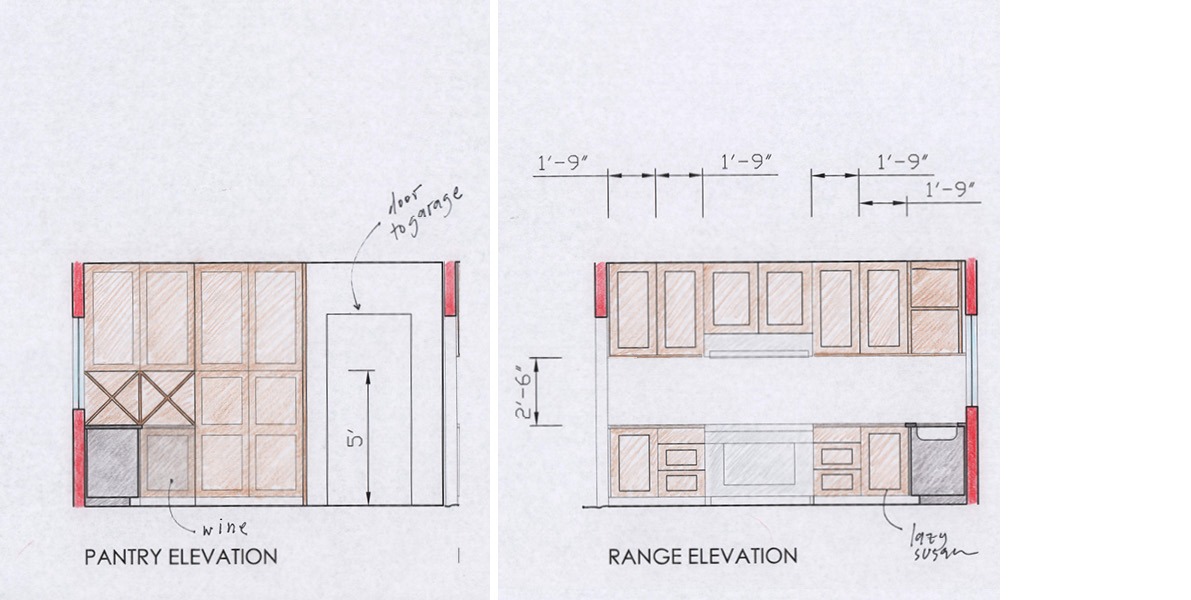
PANTRY ELEVATION:
- Upper cabinets to the left of the pantry can be either 24” or 12” deep. (In the end, we went with 12”.)
RANGE ELEVATION:
- It’s the only elevation where both lower and upper cabinets are 21” wide instead of 24”
- The corner can be accessed from this side if you opt for doors instead of drawers
- Open shelving to the right, by the window
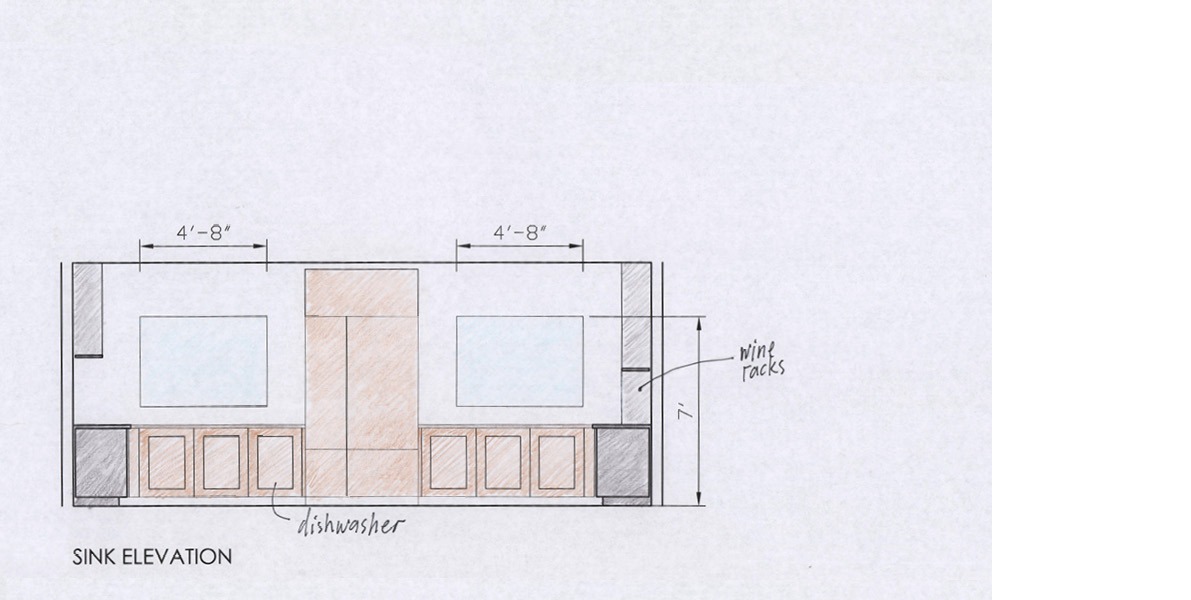
SINK ELEVATION:
- The fridge is in the center
- Windows are larger
- Dishwasher has a panel

ISLAND ELEVATION:
- The cabinets where bar stools would be could be 12” deep, so that you can put dishes there.
My client responded with a few more questions and we cleared everything up with a phone call. He followed-up with a note: “We are looking forward to the latest revisions and are so relieved to finally have a layout that we love. We’ll reach out with future questions as we would like your help with cabinet hardware, and other finishing touches.”
How nice is that! All I did was to show them how to streamline their kitchen elevations. It was my pleasure. If you have any questions, please write to me here.
SHARE
Post a Comment
You must be logged in to post a comment.
Mia Kazovsky
This is very informative. Thank you for always sharing your sketches and processes. It’s a great treat to read your blog and always learn something new!
Alla DIY Ally
As you know, Mia, it’s my pleasure!